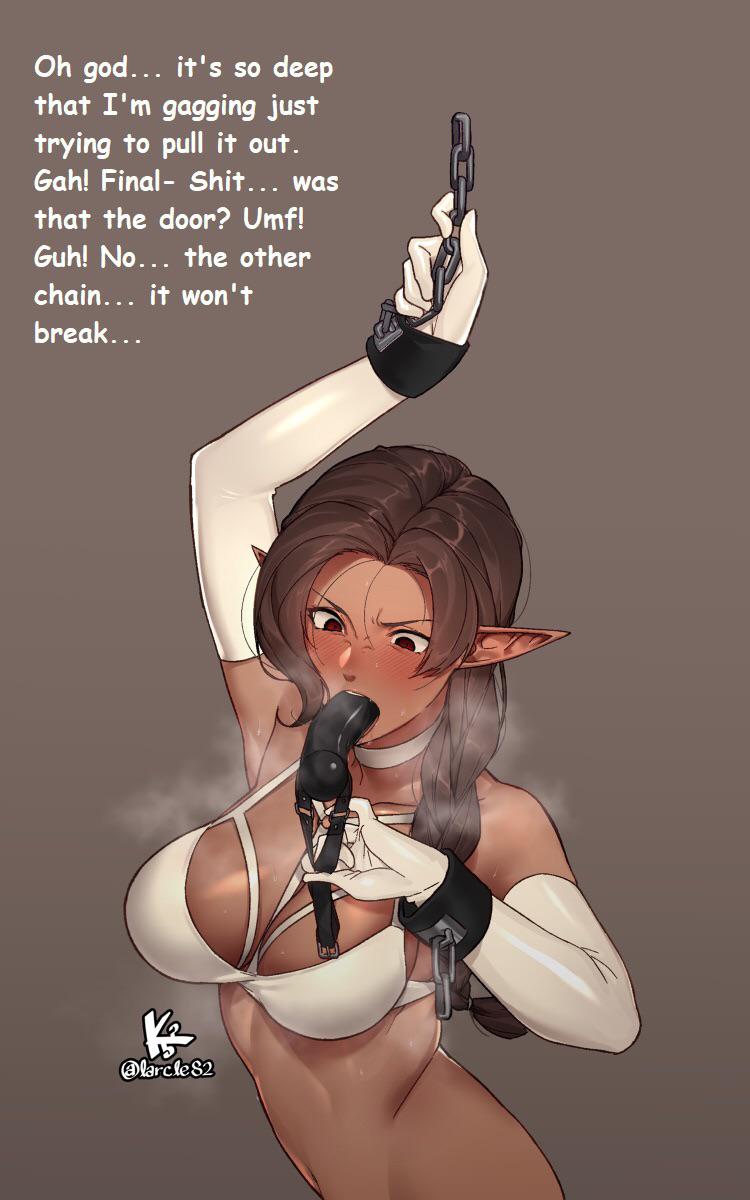
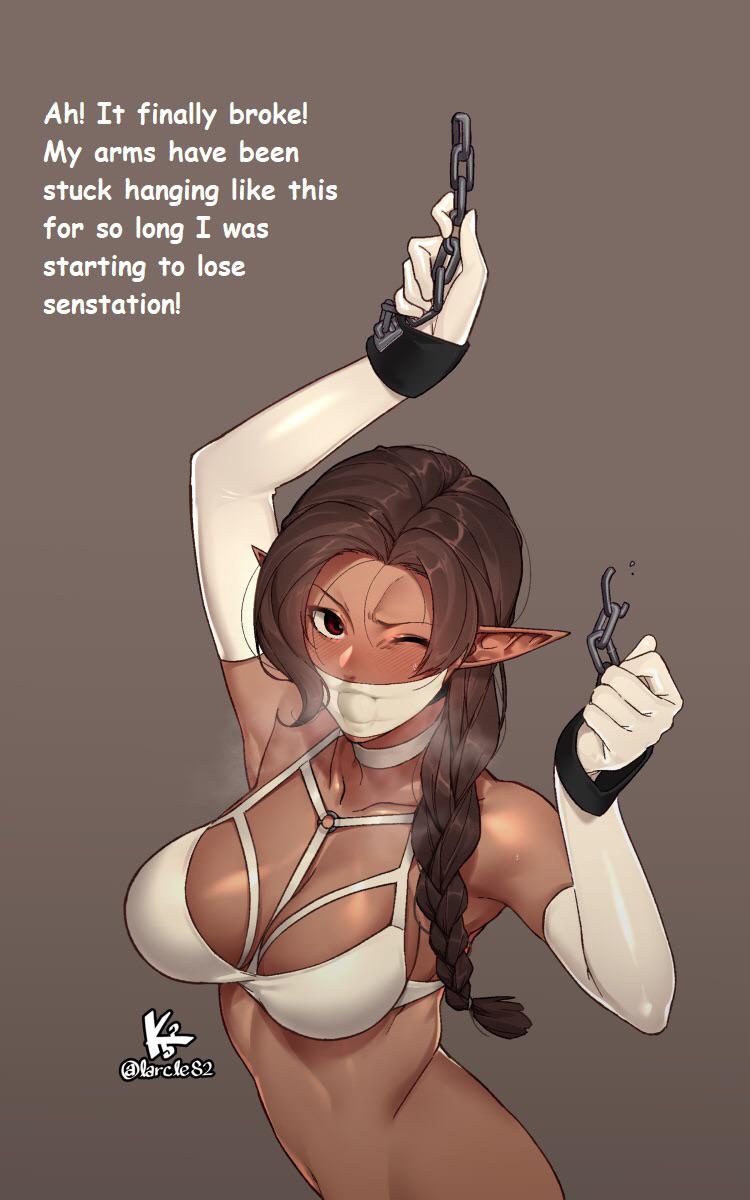
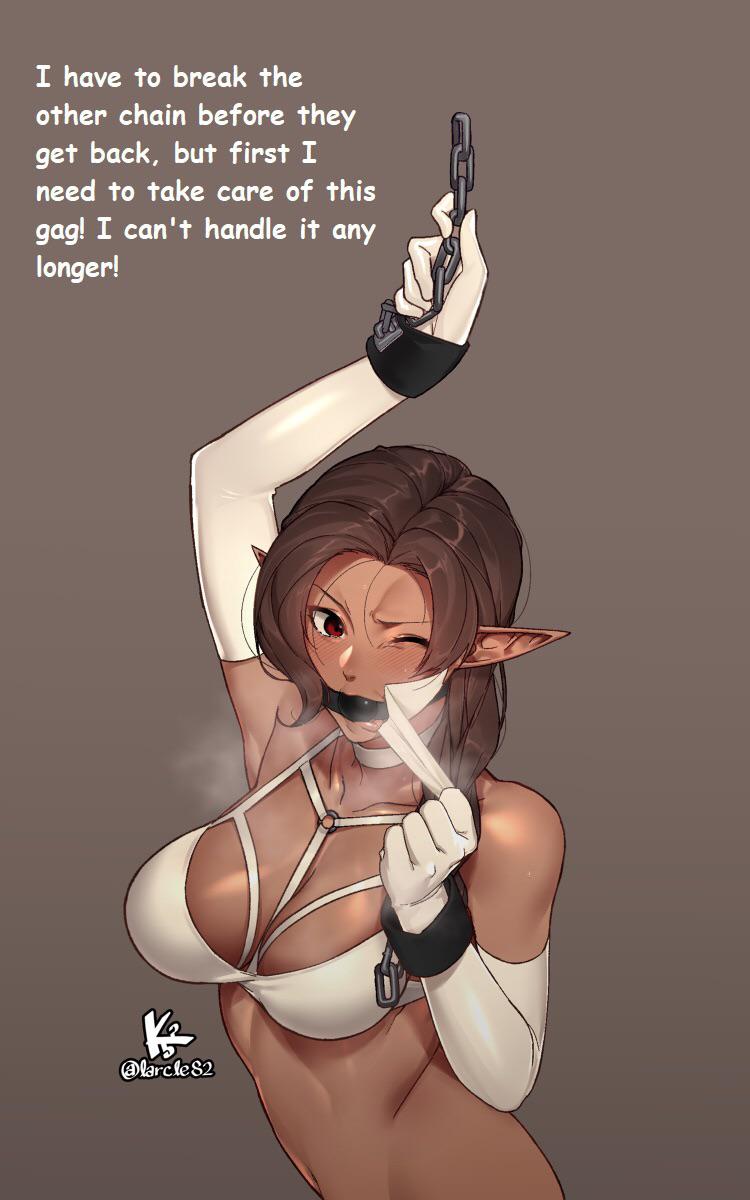
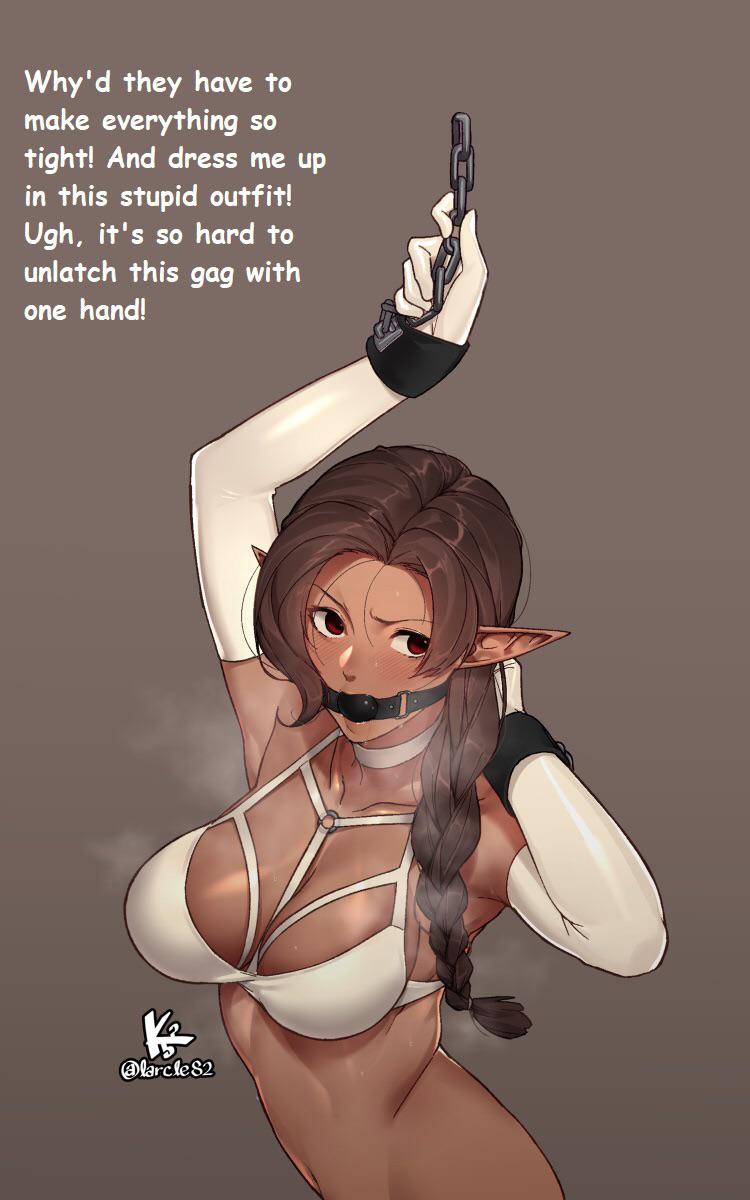
Escape in progress. Keeping the Sub Alive (Part 162) (Four Images) | image 0
Escape in progress. Keeping the Sub Alive (Part 162) (Four Images) | image 1
Escape in progress. Keeping the Sub Alive (Part 162) (Four Images) | image 2
Escape in progress. Keeping the Sub Alive (Part 162) (Four Images) | image 3